


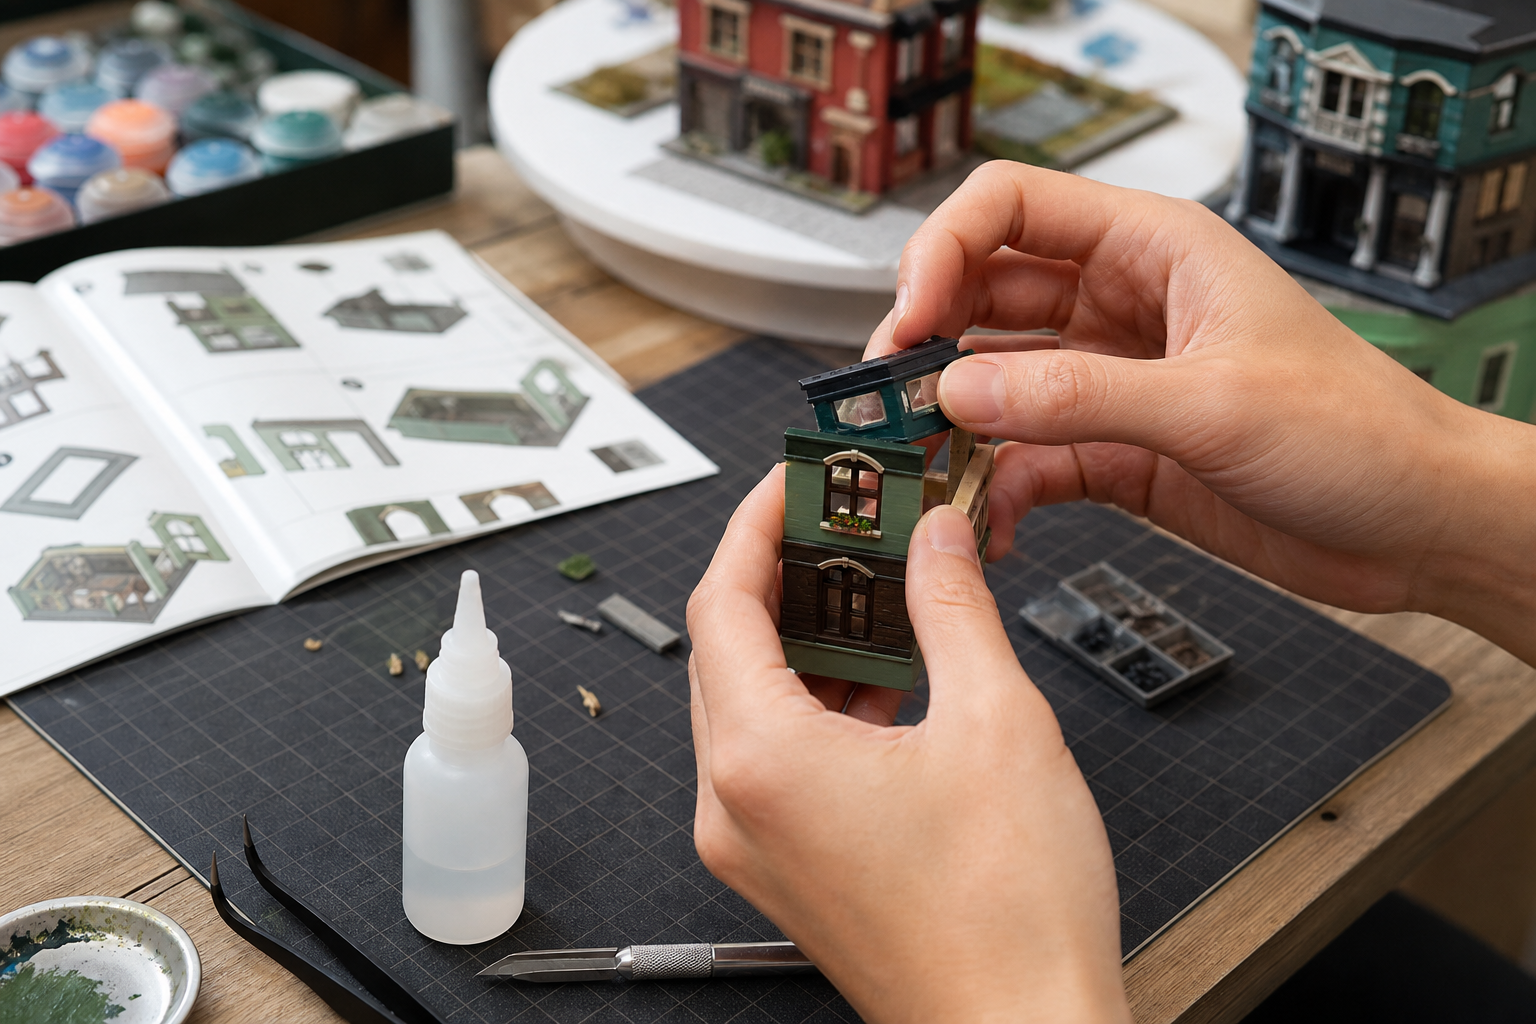
Embarking on the journey of assembling DIY miniature kits opens a world of intricate craftsmanship and creative fulfillment. These diminutive projects—whether transforming into charming book nooks, elaborate mini houses, or mechanized wooden puzzles—demand precision, patience, and a methodical approach. For novices venturing into this captivating realm, mastering foundational techniques ensures both enjoyment and stunning results.
Understanding Your Miniature Kit Components
Before diving into assembly, familiarize yourself thoroughly with every component nestled within your kit. ROCOXIA's miniature kits arrive with pre-cut pieces, adhesives, embellishments, and detailed instructions that serve as your roadmap throughout the construction process. Spread all materials across a clean, well-lit workspace, organizing them by type or assembly sequence.
Examine each piece carefully. Wooden components may exhibit natural grain variations that add character to your finished display. Identify any delicate elements—such as translucent windows, tiny furniture pieces, or ornamental fixtures—that require gentler handling. This preliminary inventory prevents mid-assembly scrambles and helps you appreciate the complexity awaiting your skillful hands.
Creating an Organized Workspace
Establishing a dedicated assembly station transforms chaotic confusion into streamlined productivity. Designate a flat surface where your project can remain undisturbed between sessions. Adequate illumination proves essential; consider positioning a desk lamp to eliminate shadows that obscure fine details.
Small containers or sectioned organizers keep diminutive parts from vanishing into workspace crevices. Label each compartment according to assembly stages or component categories. This organizational framework becomes increasingly valuable as projects grow in complexity, allowing you to locate specific pieces without frustrating searches.
Essential DIY Miniature Assembly Tips for Tool Selection
While many kits include basic implements, supplementing with quality tools elevates your assembly experience significantly. Precision tweezers grant control when positioning minuscule elements that fingers cannot grasp adequately. Select tweezers with fine, aligned tips that meet perfectly without gaps.
Craft knives with replaceable blades enable clean cuts when trimming excess material or refining edges. Maintain sharp blades consistently—dull edges produce ragged cuts and require excessive pressure that risks slippage. A self-healing cutting mat protects your work surface while providing measurement grids for alignment verification.
Adhesive Application Mastery
Glue selection and application technique determine structural integrity and aesthetic cleanliness. Quick-drying adhesives offer convenience but demand swift, accurate placement since repositioning becomes impossible within seconds. Conversely, slower-setting formulas permit adjustments yet require patience as components cure.
Apply adhesive sparingly using toothpicks or fine applicator tips. Excess glue seeps beyond joints, creating unsightly residue that mars finishes and attracts dust. When bonding porous materials like wood, allow slight absorption time before joining surfaces—this prevents weak bonds caused by insufficient contact.
The hallmark of expert miniature assembly lies not in speed, but in deliberate precision that honors each component's contribution to the unified whole.
Deciphering Instruction Manuals Effectively
Instruction booklets accompanying miniature kits function as your cartographic guide through the assembly landscape. Read through the entire manual before commencing construction, noting any warnings, recommended sequences, or preparation steps. Some assemblies require sub-component creation before integration into larger structures.
Illustrations often convey information that text cannot adequately describe. Study diagrams carefully, noting orientation markers, connection points, and spatial relationships between elements. Cross-reference step numbers with your physical components to ensure correct identification—similar-looking pieces may differ subtly in dimensions or hole placements.
When Instructions Seem Unclear
Encountering ambiguous directions frustrates even experienced builders. Pause rather than proceeding with uncertainty; incorrect assembly necessitates difficult disassembly that may damage delicate pieces. Online communities dedicated to miniature crafting often provide clarification, and ROCOXIA's customer support stands ready to assist with specific kit questions.
Photographing your progress at each completed stage creates a visual record enabling backtracking if errors emerge later. These images also serve as personal documentation of your evolving skills and provide satisfying before-and-after comparisons.
Mastering Paint and Finish Applications
Many miniature kits incorporate pre-colored elements, yet customization through painting personalizes your creation. Acrylic paints work exceptionally well on miniature surfaces, offering quick drying times, water cleanup, and excellent coverage. Thin coats prevent obscuring fine details—multiple light layers surpass single heavy applications.
Primer application ensures uniform paint adhesion, particularly on smooth plastic or varnished wood surfaces. Allow complete drying between coats; premature handling smudges wet paint and embeds fingerprints into your meticulous work. Fine-grit sandpaper gently smooths any imperfections before final finishing.
Weathering and Aging Techniques
Adding realistic weathering transforms pristine components into authentically aged treasures. Dry brushing—lightly dragging nearly dry paint across raised surfaces—highlights texture and dimension. Diluted washes settle into crevices, emphasizing depth and creating shadow effects that enhance three-dimensional realism.
Experiment on scrap pieces before applying techniques to your actual project. Weathering requires restraint; excessive aging appears contrived rather than natural. Study reference photographs of real structures or objects to understand how time genuinely affects materials.
Troubleshooting Common Assembly Challenges
Even meticulous builders encounter obstacles during miniature construction. Warped wooden pieces occasionally resist proper alignment due to moisture absorption or manufacturing variance. Gentle persuasion using clamps or weighted objects during glue curing often resolves these issues without forcing joints that might crack.
| Challenge | Solution |
|---|---|
| Pieces won't fit properly | Check orientation; lightly sand edges if tolerance is too tight |
| Glue dries before positioning | Switch to slower-setting adhesive or work in smaller sections |
| Missing or damaged component | Contact parts replacement service immediately |
| Paint bleeding under masking | Seal tape edges with clear medium before painting |
Leveraging Parts Replacement Services
Discovering a damaged or absent piece need not derail your project. ROCOXIA's parts replacement program ensures builders receive necessary components without purchasing entire replacement kits. Document issues with clear photographs and contact support promptly—continuing assembly around missing pieces may complicate later integration.
This commitment to comprehensive support distinguishes quality miniature kit providers from budget alternatives. Reliable assistance transforms potential frustrations into minor inconveniences, maintaining your creative momentum and project enthusiasm.
Timing Your Assembly Sessions
Miniature construction rewards sustained focus yet punishes fatigue-induced errors. Schedule assembly periods when you feel alert and unhurried—rushing through intricate steps invites mistakes that require tedious correction. Many builders find evening sessions therapeutic, providing meditative relief from daily stresses.
Recognize when diminishing concentration signals time for a break. Attempting complex procedures while mentally exhausted produces substandard results that disappoint upon later examination. Patience throughout the process yields satisfaction that hasty completion cannot replicate.
Illumination and Detail Enhancement
Incorporating lighting elements elevates miniature displays from static dioramas to enchanting, illuminated vignettes. LED strips or tiny bulbs designed specifically for miniatures consume minimal power while providing warm ambiance. Plan wiring routes during early assembly stages to conceal electrical components within structural elements.
Test lighting circuits before permanently securing them within your construction. Troubleshooting electrical issues becomes exponentially more difficult after gluing surrounding structures. Battery-powered options offer flexibility for displays positioned away from electrical outlets.
Showcasing Your Completed Miniature
Your finished creation deserves presentation that protects and highlights the craftsmanship invested. Glass display cases shield delicate elements from dust accumulation and accidental damage while providing unobstructed viewing from multiple angles. Strategic positioning near natural light sources accentuates colors and textures without causing fading that prolonged direct sunlight produces.
Consider thematic arrangements when displaying multiple miniatures. Book nook scenes nestle naturally among actual books on shelves, creating delightful surprises for observant visitors. Mini houses and mechanical puzzles become conversation centerpieces on mantels or curio shelves.
Continuous Skill Development
Each completed miniature kit enhances your repertoire of techniques and problem-solving abilities. Progressive projects of increasing complexity challenge expanding skills while preventing stagnation. Document lessons learned in a building journal—notes about successful techniques, adhesive preferences, or color combinations inform future endeavors.
Engage with fellow enthusiasts through online forums, social media groups, or local crafting circles. Sharing experiences, techniques, and encouragement builds community while exposing you to innovative approaches you might not discover independently. This collaborative spirit enriches the miniature-building hobby beyond solitary construction.
Why Quality Kits Matter for Beginners
Novice builders benefit immensely from well-designed kits featuring precise cuts, comprehensive instructions, and quality materials. Frustration stemming from poorly manufactured components or ambiguous guidance discourages continued participation in this rewarding hobby. Investing in reputable providers like ROCOXIA ensures positive initial experiences that foster long-term engagement.
The availability of flexible returns and secure payment options demonstrates manufacturer confidence in product quality. These assurances allow beginners to explore miniature assembly without financial anxiety, knowing support exists if kits fail to meet expectations.
Frequently Asked Questions About Miniature Assembly
How long does assembling a typical miniature kit require? Duration varies considerably based on kit complexity and individual pace, ranging from several hours for simpler designs to twenty-plus hours for elaborate mechanical puzzles or detailed architectural models. Embrace the process rather than fixating on completion timelines.
Can children participate in miniature assembly projects? While many kits contain small components presenting choking hazards for young children, older youngsters with developed fine motor skills can enjoy simplified miniatures under adult supervision. Family collaboration creates shared memories and teaches valuable patience and precision.
What happens if I make an irreversible mistake during assembly? Many errors prove correctible with careful disassembly, though some adhesives bond permanently. Prevention through careful planning and slow, deliberate work minimizes catastrophic mistakes. Remember that minor imperfections often become invisible within the completed composition.
Do I need prior crafting experience to succeed with miniature kits? Absolutely not. Quality kits designed for beginners assume no previous expertise, providing all necessary guidance and components. Your willingness to learn and patience with the process matter far more than prior experience.
The realm of miniature assembly welcomes anyone seeking hands-on creativity, decorative craftsmanship, and the profound satisfaction of transforming raw components into captivating displays. Armed with these foundational diy miniature assembly tips, you possess the knowledge to embark confidently on your first project, knowing that each careful placement and patient moment contributes to a stunning creation reflecting your dedication and emerging artistry.


Partager:
5 Surprising Benefits of the Miniature Hobby for Adults
Gifts for Book Lovers: 15 Unique Ideas Readers Will Actually Use